In this wild wild world of Web Development, there are just so many things to try out!
and if you have the itch and that kind of free time, go wild!
I had both, so I created my first Google Chrome Extension which addresses a problem which is very frustrating for me.
Motivation & Frustration
Being a Tech Lead, Along with development, I have to -
- Prepare JIRA tickets for the developers so that they have something to work upon in the sprint.
- Cumulate different tickets for each of the developer.
- Cumulate different tickets which needs some more clarification from the clients.
- Cumulate different tickets which we will be able to pick according to our bandwidth.
Lots of cumulating right ? You must think I got a boring job.
Anyways, all of that cumulating requires me to go to the browser, copy a link, and paste it on a Teams draft message, and then do that activity again for other tickets.
And this becomes a whole lot frustrating when your chrome window looks like this -

Most of the times, all we are able to see are the favicons of the tabs, and we don’t know which tab we are hitting. (Granted, many other browsers offer vertical tabs, but not Chrome. Need an extension for that)
My Extension
This is what I did -

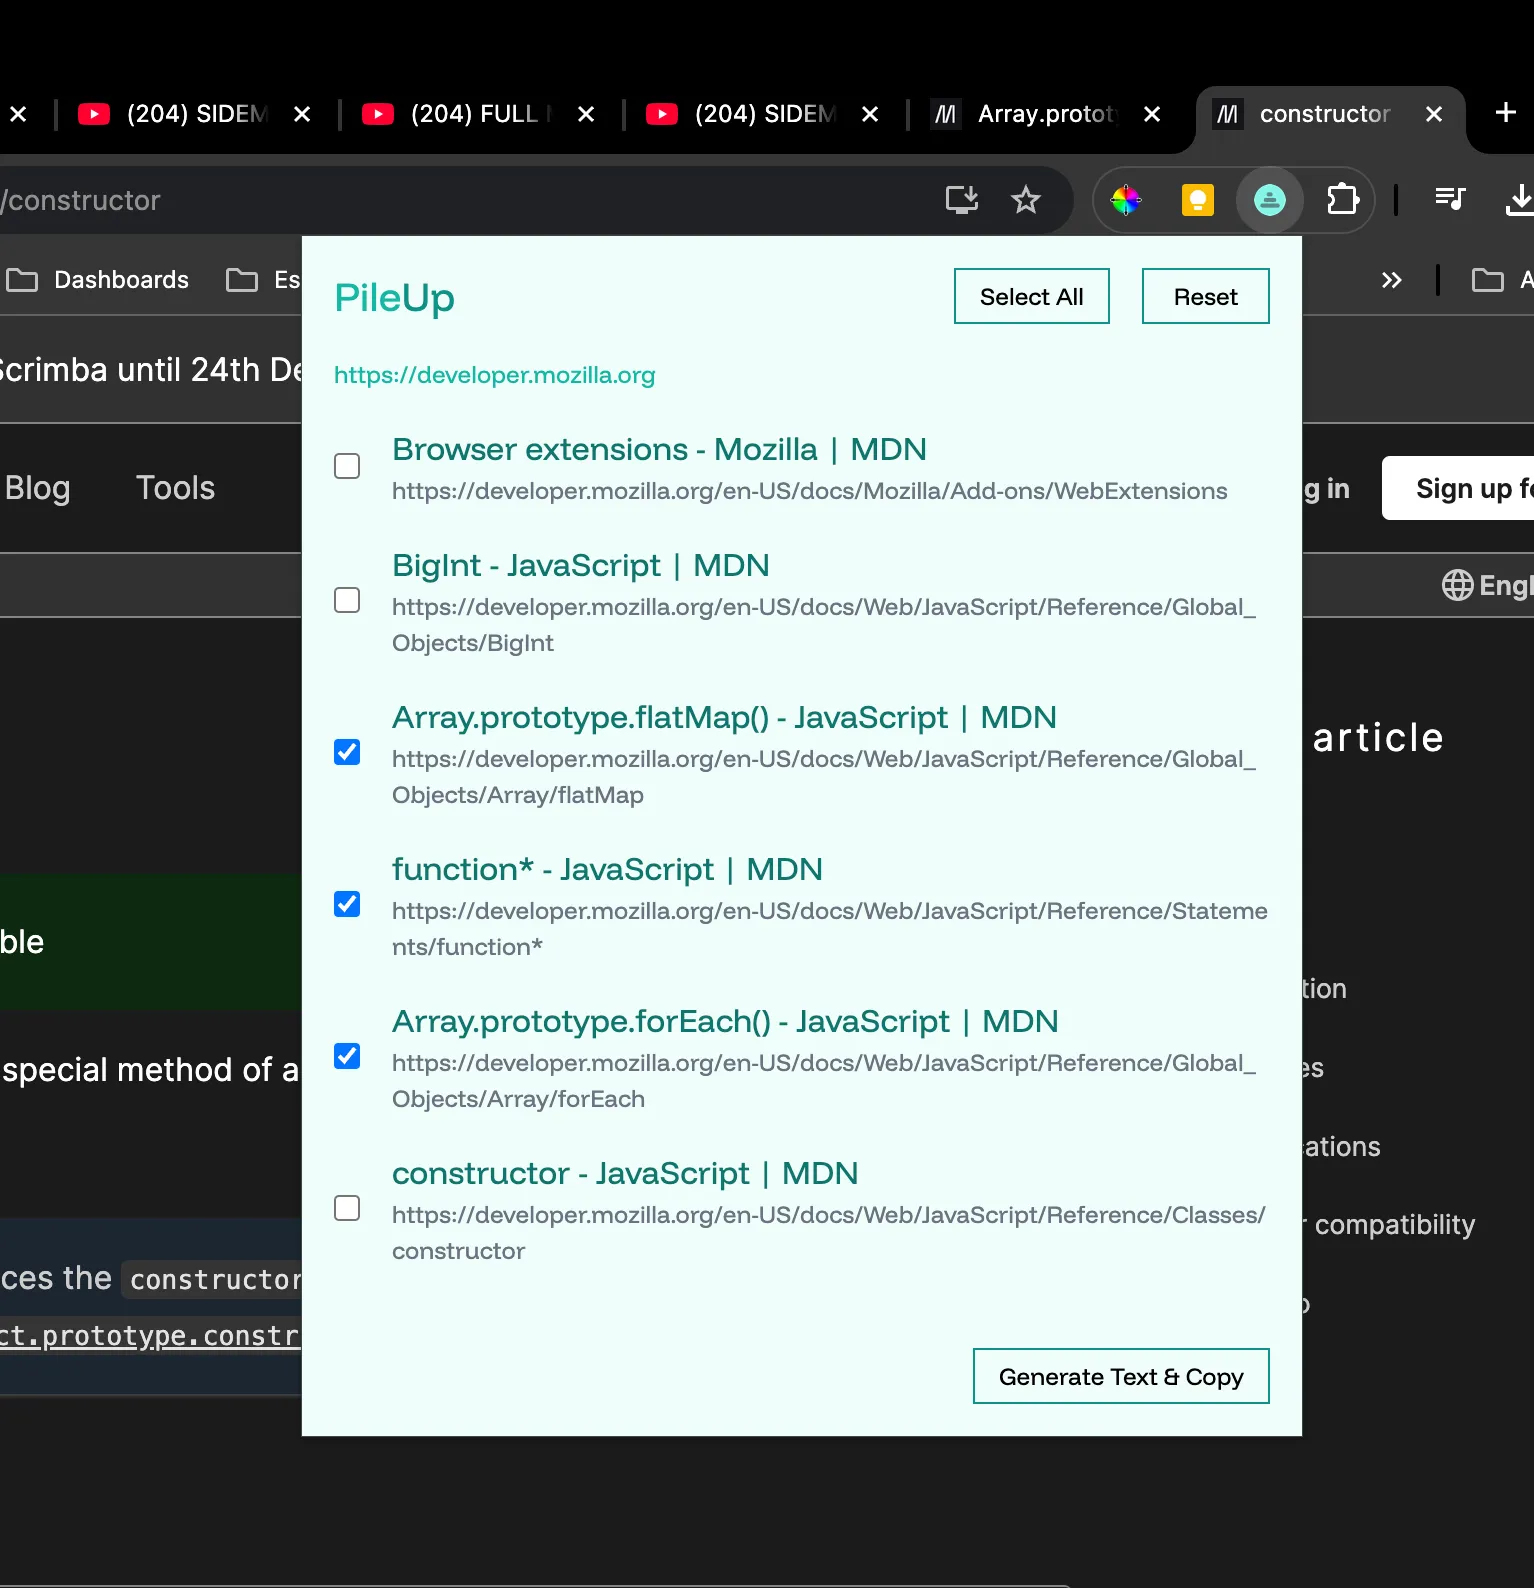
A very basic looking extension which displays a domain-wise list of all the opened tabs of the browser window, using which user can select multiple links at once, and then generate a single cumulative text message which contains all the selected links.
This generated text will get automatically copied to the clipboard!
Link to my extension - PileUp - Chrome Extensions.
Creating the Extension
The above problem statement was a perfect excuse for me to get off my ass and finally dive into extension development, which turned out to be so easy!
Journey of creating any extension starts with a manifest.json file.
Lets create the most basic extension. Here are the steps -
- Create a Folder, add a
manifest.jsonfile in there with following content:
{
    "manifest_version": 3,
    "version": "1.0.0",
    "name": "PileUp",
}
- Zip the folder, keep it handy.
- Go to
chrome://extensionsand enable Developer Mode.

- Click
Load Unpackedand upload the zip file. Thats it!

That’s how we can test our extensions locally.
It won’t do anything though, as of now. Lets make it do something.
Adding HTML for the Pop Up
Something needs to happen or something needs to pop-out, right ?
Lets say we have a HTML file - index.html ready with all the necessary scripts and styles added into it.
Now, lets update our manifest.json.
{
    "manifest_version": 3,
    "version": "1.0.0",
    "name": "PileUp",
    "action": {
        "default_popup": "index.html"
    },
    "permissions": [
        "tabs"
    ],
    "host_permissions": [
        "http://*/*",
        "https://*/*"
    ],
    "icons": {
        "32": "icons/icon32.png",
        "16": "icons/icon16.png",
        "24": "icons/icon24.png",
        "48": "icons/icon48.png"
    }
}
Here we are passing our index.html in action.default_popup property which is all we need for our UI to show up when we click the extension.
There are some more keys though -
- permissions is nothing but an array of all different APIs which will be accessed by our application - Chrome Extension APIs.
- host_permissions is the ruleset which determines any specific domain your extension needs to target. In my case, the extension is for everyone.
- icons is nothing but a list of paths of different sized icons like 32x32, 64x64, e.t.c.
Developing the Extension Build
We are not going to straightaway start writing our scripts and styles in that html. No no.
We will have a proper project structure with different files to address different sections of our extension. We’ll just bundle all of our code into that single HTML file.
Hmm, who does that ? A lot of bundlers and build tools like Vite, Turbopack, Webpack and so many more.
I used Vite as a bundler using which I was able to just build the extension like any other normal web application with React and TypeScript and then bundle it via npm run build command. Simple!
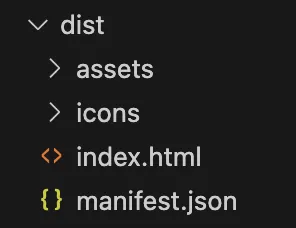
It will just bundle all of my application code inside our HTML, put all the assets, and files present in public folder inside dist folder.

All I have to do now - just move the manifest.json here. Zip the dist folder and load it in the browser to test.
Accessing Browser tabs
You must be wondering how did I get the title and url of the tabs opened in the browser.
chrome.tabs.query({}, (tabs) => {
    //...
})
This way I can query all of the available tabs I have in my browser window.
Publishing the Extension
You need to have a developer account registered with Chrome Web Store. It’s not free, you’ll be $5 ~ ₹424.38 poorer.
Once the account is created, all you need to do -
- Upload the
.zipfile. - Upload some screenshots of the extensions.
- Mention justifications for the APIs being used.
- Mention justifications for the host permissions being set.
And that’s it! You can also create your own extension and even make some money off of it.

